Windows operating system file manager directory system example.
(click on thumbnail images for enlargements)
Here is an example of how to effectively store and file projects on your
Windows computer so you can find your projects later and have some organization.
As I have some 10,000+ models, documents, spreadsheets, and photo collections on
my computer, being organized is critical.
1) Right click on the Start button and a pop-up window will show some choices
the one we are concerned with here is the "Explore" option. Click on that.

2) Here we see the explorer window pop up. In earlier versions of Windows this
was known as the "file manager" a far better name. For very poor reasons
Windows decided to merge the "file manager" and the "internet browser" into
something called the "internet explorer" and confuse everybody. They are both
the same program, but the program can function in two modes, I refer to
the explorer looking at the internet as the "browser" and the explorer looking
at your hard drive as the "file manager" to [try at least to] avoid
confusion. In this next slide I turn the file manager view to show the details
of the files, this is extremely helpfull, that is why Windows OS turns it off
by default:

3) In the next slide I show other settings that should be set in your file
manager. These steps (and the above) should only have to be done once. You'll
want to turn on and off various settings so that you can actually see the files
that are on your system and the names these files actually have. Again very
usefull information and again in Windows OS designers usual warped sense of
logic, these are normally turned off. They prefer to have users distinguish
files by a ridiculous set of icons that resemble egyptian Hieroglyphic's rather
than let the user see the file name such as pictures.zip or pictures.jpg (where
the ".zip" tells the user that it is a zip file versus the ".jpg" tells the userthat the file "picture.jpg" is a picture in jpg format.)
Reset the check boxes as shown and then finish by pushing that "Apply to all
folders" button. And your file manager will be a indensible tool.

4) In the next slide we can see some of the organization I've already done on
the hard drive of my computer and the new backup folder I'm about to create.
On the left hand side you can see the tree view of the hard drive (you may have
to turn this on as well with the View --> Explorer Bar --> folders option, I
won't bother complaining about Microsoft engineers anymore.) You'll see I
created a folder called "Jon" were I keep all of my stuff. This is good place
to start, as if you have several people that use the PC you can keep your stuff
separate from theirs. I then made a sub-directory under jon\ called "dl"
and under that many more sub-directorys further labeling various projects. This
helps when I want to find something or use the search faclility.
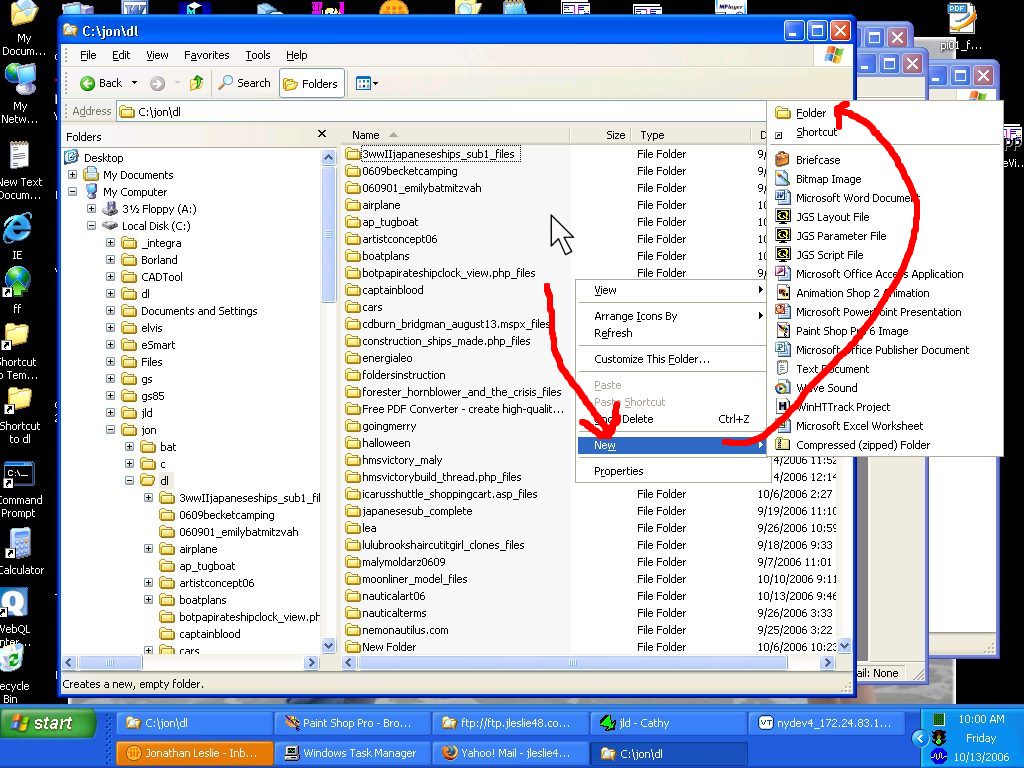
By right clicking on the right hand side I bring up a pop-up menu that allows
me to make a New folder, click on those:

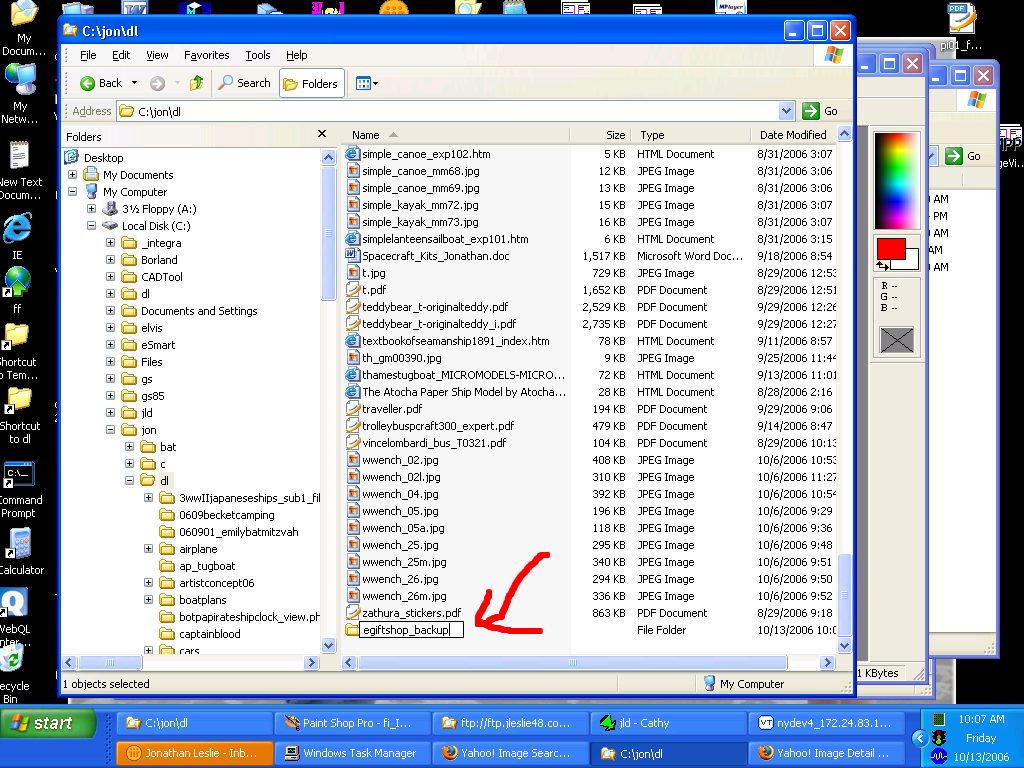
5) and rename the new folder to something significant. Here I'm getting ready
to backup the egiftshop so that is what I'm going to name the sub-directory:

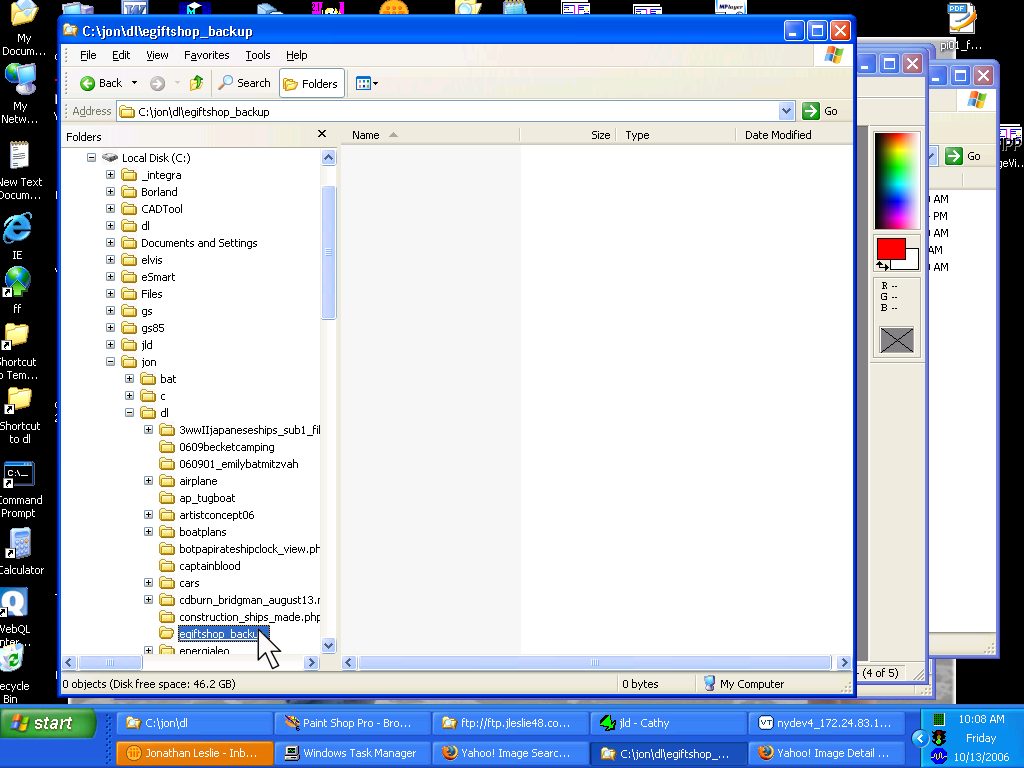
6) at this point, I double clicked on the new folder "elten_backup" and the
right hand side of the file manager window appropiately shows me the contents
of that empty folder. I can now drag and drop, create, move, or use programs
like httrack to populate the folder "elten_backup" with files and
of appropriate sub-directories.